Pages

Saturday, February 22, 2014

A chili that comes almost entirely from jars, bottles and cans, but tastes awesome.


This chili recipe has been idling in my email drafts folder for sometime now (a year at least). It has become one of my go-to winter recipes. This is the dish I cook upon returning home from traveling, when I'm craving detox food, but have nothing in the fridge. Everything you need to make this dish can be found at your bare-bones grocer. In fact, you can probably find some reasonable approximation at your local dep. And if you *do* have things idling in your fridge, it's a great way to use those up too. As long as you have some semblance of spice, garlic, onions, tomatoes, and beer (that's right,  beer is the secret to kick-ass veggie chili), you can twiddle the other ingredients however you like, and still end up with a hearty, flavourful hot bowl of goo.

Ingredients:

(This looks like a long list, but most of these come in bottles or cans, so the prep is pretty minimal):

  • ​2 onions - chopped
  • 2 celery stalks, finely diced
  • 2 jalepeno (seeds in or out) - finely diced
  • 4 cloves garlic - minced
  • 2 zucchinis - quartered and chopped into 1/2 inch chunks 
  • 1 green pepper - chopped into 1/2 inch chunks
  • 1 bottle dark-(ish) beer 
  • 1 can corn - rinsed and drained
  • 2 small, or one large cans chopped tomatoes
  • 1 Tbsp chili mix/ chili powder (individual taco seasoning packs work, or you can buy it in bulk)
  • cinammon, cumin, cayenne, salt etc. to taste (my chili powder is quite hot, so I use it sparingly, and supplement it with a bit of extra cumin and paprika)
  • 1.5 cans beans (pretty much any beans will do here, I've used mixed beans, black beans, pinto beans, refried beans, chick peas, and even baked beans in a pinch) -- Make sure to rinse and drain them though, if they're the sort that need rinsing and draining
  • 1-2 tbsp balsamic.
  • Optional: Yogurt/sour cream, cheese, or cilantro to serve
Preparation:
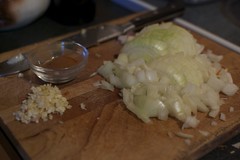
  1. First chop all the veggies (this is the most time consuming step).
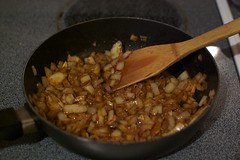
  2. Put a bit of oil in a put and when it is hot, add onions and celery. Saute stirring regularly until onions are beginning to brown. 
  3. Add jalepenos and garlic. Cook stirring until fragrant, about 1 min (the "fragrance" will be hard to miss -- and may make your eyes water).
  4. Lower the head a bit and add green pepper and zucchini. Cook covered, stirring occasionally, until peppers and zucchini have begun to soften (I usually give it 10 -15 min).
  5. Add the beer, and bring to a boil (uncovered). Let boil until the beer has decreased by half volume-wise, and the steam no longer smells boozy.
  6. Add tomatoes (and their juices) and chili powder and any other spices, and let simmer.
  7. Once the zucchini and pepper are almost cooked, add the drained, rinsed beans and corn, and cook for another 5-10 minutes (until heated through)
  8. Lastly (trust me on this one) remove from the heat and add 1-2 tbsp balsamic vinegar (crazy, I know, but the zing of the vinegar is just what the chili needs to brighten the flavor and counteract the "umaminess" of the beer based broth).
This recipe makes a big batch (probably serves about 8),  but I never have any difficulty getting through the leftovers.


Sunday, January 12, 2014

Spicy miso ramen, with a not-totally-terrifying ingredient list


I'd been meaning to attempt homemade ramen for some time now (not Tonkatsu or anything crazy, because boiling pork bones for 6 hours seemed like a big commitment), but I figured your basic (spicy) miso ramen couldn't be that hard to do...So of course, I bought vegetable broth, noodles, some sort of miso paste and veggies and gave it a shot. Oh dear. Turns out there are *lots* of different types of miso pastes, and if you try to make soup with one that's best suited for marinading meat, your soup tastes like, well, marinade. Ick.

Back to the drawing board, or rather, internet. Recipes ranged from "one small step above instant ramen" to "make your own noodles", eventually, I found a few that were in line with what I wanted. My second attempt (pictured above) was based loosely off of this.

First off, let's talk ingredients. There are a few scary Asian-grocery only items in this recipe. The secret is that they are all either dried or freezable, so you can make one Asian-grocer run, and it will last you for several bowls of ramen. 

Here is a Japanese ingredient primer. Aside from the miso paste and some sort of kelp/seaweed, most are also substitutable/skippable if need be:


  • Miso paste: I bought "shiro" which is the lightest variety (and the kind basic miso soups are made with). Other recipes recommend "awase" (reddish in color). My first attempt involved "hatcho miso" which is dark brown and really pungent (not recommended). Either way, you'll need about 2 tbsp/ramen bowl, and the package you buy will likely be 10 times that size (at least). Freeze the rest, and lop of chunks as needed.
  • Dashi base: This is a "seafood broth base" in the form of granules. You mix a small amount of it with boiling water, and it gives it that vaguely seafoody (but not fishy), flavor that is typical to a Japanese dish. I used 1 pkg (1/3 tsp) for one bowl of ramen, but the box I bought contained 10 such packages, keep them sealed in a dry place and they'll last quite well.
  • Kombu (dried kelp): I think you can actually buy dashi base with kombu in it, but I ended up buying them separately. Again, I used a 2" x 4" piece, but the package I bought contained several large sheets. I sealed the leftovers in a ziplock bag and stored for future ramen ventures.
  • Bonito flakes: These are thinly shaved pieces of smoked dried fish. You can either use them as topping, or in preparing the broth, (I just used them to season), seal the leftovers in a bag and store in the fridge or in a dry place -- they should last pretty well (if they start to stick together, they should be pitched though).
  • Gochujang: This is Korean fermented red pepper paste, and it's what puts the spice in spicy miso. I used 2 tsp, but it came in a giant vat, which I froze for future use (also, you could probably use siriacha, or any other instant zing-maker here).
Right. On to the recipe.

Ingredients (for one bowl of ramen):


  • 1 tbsp sesame oil
  • 1/4 c ground pork (organic if possible)
  • 1 tbsp ginger (finely chopped)
  • 1 tbsp garlic (finely chopped)
  • 1 tbsp sake or rice vinegar
  • 2c water (a little more if needed)
  • 1 piece kombu 2"x 4"
  • 1/3 tsp  (1 package) dashi base
  • ~5 mushrooms, sliced (fresh or dried -- I used dried shitake)
  • 2 tbsp miso (shiro or awase)
  • 2 tsp gochujang (or other spice-ifier)
  • 1/4 c firm tofu (chopped into 1/2 inch cubes), or other meat/meat substitute
  • 1 pkg instant ramen (throw out the flavor pouch that comes with it)
  • 1 hard boiled egg (optional)
  • 1 green onion sliced
  • Bonito flakes (to taste)
Preparation:
  1. fill a pot with water, add the egg and bring to a boil. Once boiling, remove from heat and let stand covered 10 min.
  2. While the eggs are cooking, heat sesame oil in another pot.
  3. Add garlic, ginger and hot paste, saute until fragrant.
  4. Add ground pork and saute until no longer pink.
  5. Add sake/vinegar, cook for another 30s
  6. Add water, dashi base, kombu, and miso and mushrooms and bring to a gentle simmer (not a rolling boil)
  7. The eggs should be about done by now, so remove them and set aside.
  8. Bring the water the eggs were in back to a boil and add ramen, cook until just done, drain and place in bowl, along with tofu
  9. Test broth for seasoning and make sure the mushrooms have softened (if using dried), add miso/spice if needed.
  10. Pour broth over noodles, top with chopped green onion, bonito flakes (if using) and peeled and halved hard boiled egg.
As I said, ingredient list: a little scary, preparation: not too bad at all.  The ground pork is a hack, to give the broth a bit of depth without having to boil pork bones for hours on end. Another option would be to add 1c broth (chicken, beef, or fish) and 1c water, instead of 2c water.

Sunday, March 4, 2012

Ways to Feel Warm on Dreary February Evenings

After about the third iteration of snow-->rain-->melt-->freeze (a common occurrence here in Montreal at this time of year), I decided a night of good friends and food from warm, dry places was needed. So I hosted a vaguely-Moroccan themed dinner party.


The menu consisted of 3 main items:

  • Zalouk, which I assembled 5 minutes before the guests arrived and which was gone shortly thereafter, i.e., before any pics could be taken. All I'll say is this: take the time to roast the eggplant. It's dead easy and makes a world of difference.

  • Chicken Tagine (it's always a good sign when you can follow your own recipe).

  • And a carrot and chickpea salad, which was a hybrid of two recipes: Chachi's carrot and chickpea salad , and Pan Chancho Bakery's Moroccan chickpea salad.


Between the chick pea salad and the chicken tagine, there are a lot of similarities. Similar to Indian food, there are a few core spices/flavors that most Moroccan dishes share, and once you have that, you can get pretty creative.

Ingredients:


  • 3 cups grated carrots
  • 1 15oz. can chickpeas, drained and rinsed.
  • 2 onions (about 1 3/4 cup, chopped)
  • 1/3 cup extra-virgin olive oil
  • 1/2 tsp salt
  • 2 tsp paprika
  • 1/4 tsp chili pepper flakes
  • 1 tsp cumin
  • 3/4 tsp cinnamon
  • 3 cloves garlic (about 1 1/2 Tbsp)
  • 1/2 cup tomato paste
  • 2 Tbsp of chopped mint/parsley/cilantro
  1. First, grate the carrots and drain and rinse the chickpeas, set aside.
  2. Next, chop onions, garlic, and assemble spices.
  3. In a medium skillet, heat the olive oil over medium heat and add the onions--cook until tender.
  4. Add garlic and cook for another 2 minutes.
  5. Add tomato paste and mix in well and cook for another 5 minutes.
  6. In a large bowl, toss tomato mixture with the chickpeas and mint/parsley. Taste and add some salt if needed.


Sunday, February 5, 2012

"Women, Cats and Marmalade...


Marmalade moodiness, originally uploaded by CaitKP.

will do as they please, and men, dogs and marmalade makers should relax and get used to the idea." To paraphrase a quote from Robert Heinlein.

The photo above shows marmalade made from the same recipe (Nige's), in different years (left: this years batch, right: 2 years ago's batch).

How one of them ended up several shades lighter but with a firmer set than the other is anybody's guess. All I know is that they both taste delicious..totally different, but delicious none the less.

Marmalade...always an adventure.

Monday, January 23, 2012

Mushroom Vindaloo

Mushroom Vindaloo
(originally taken from here)

Ingredients:
1-2 pack of button mushrooms (about 3 cups, sliced if big and whole if small)
1 small onion, chopped
1" ginger chopped
3 cloves garlic
1 15 oz can crushed tomatoes
1 Tbsp cumin powder
1 Tbsp ground coriander
1 tsp turmeric
1 tsp garam masala
2 dried red chilies, with seeds (crumbled)
2 chopped serrano chilies (seeds or not, depending on how brave you are)
1 tbsp white vinegar
1/2 cup yogurt
2 tbsps chopped cilantro leaves
2 tbsps olive oil
Salt to taste

Directions:
1. Grind onions, garlic, serrano chilies, and ginger into a fine paste (I use a mini food-processor, but a mortar and pestle should work too).
3. Heat oil in a pan; add the onion, garlic, ginger and chili paste and saute on medium heat until the raw smell of the onion is gone and the mixture has turned slightly golden (about 5 min.).
4. Now add the crushed tomatoes, turmeric, red chilies, garam masala powder, cumin powder,ground coriander and saute well for about 3-4 minutes until well blended and the spices are fragrant.
5. Add the yogurt, salt and mushrooms and simmer for about 20-30 minutes or until the mushrooms are cooked to the desired consistency.
6. Add white vinegar and simmer for few more minutes.
7. Garnish with coriander leaves and serve.

Sunday, January 22, 2012

Chicken Tagine with Chickpeas and Apricots

Edit: I made it again, and now there are photos!


I made this a couple weeks ago, but wanted to get a photo before I published the post...however, it "got et" before any such photo could be taken...so you'll just have to make it and see for yourself.


2 Tbsp olive oil
4 skinless chicken thighs
1 large onion, chopped
1″ piece of fresh ginger, chopped
3 cloves garlic, finely chopped
1.5 tsp ground coriander
1 Tbsp ground cumin
1.5 tsp ground cinnamon
.5 tsp cayenne pepper, or to taste
1 Tbsp harissa paste
1 preserved lemon (pith and seeds removed, chopped)
3/4 c dried apricots
1 red or yellow bell pepper, sliced
1 15-oz can chopped tomatoes.
1 15-oz can chickpeas, rinsed and drained
1-2 c chicken stock, or water
1/2 c bulgur (or couscous)
salt & pepper, to taste
1/2 c fresh parsley, chopped

In a large pot, heat oil over medium-high heat. When hot, add chicken and cook until brown on all sides. Remove from pot and set aside.

Reduce the heat of the pot to medium and add the onions. Cook until onions become soft, about 5-7 minutes. Add bell pepper and cook for 3-5 minutes. Add garlic, ginger, coriander, cumin, cinnamon, cayenne, apricots, harissa, lemon, and tomatoes. Cook for another 5 minutes, stirring frequently.

Add chickpeas to the pot, along with a cup of chicken stock or water. When the mixture reaches a gentle boil, bring the chicken back to the pan. Cover and simmer for about 15 minutes, or until the tomatoes begin to break apart. Stir in bulgur or couscous. If necessary, add more stock or water (no more than a cup) to the pan. Add salt and pepper.

Cover and simmer until the bulgur is done and the chicken is nearly falling off the bone, about 10-15 minutes. Cooking time will be less if you substitute with couscous. In the last minute of cooking, stir in freshly chopped parsley. Season to taste and serve.

Serves 3-4

Sunday, January 8, 2012

Chaat: In three easy steps


Chaat is the prototypical Indian snack/street food. It has everything you could ask for in a snack: flavour, substance, and arguably the most important, crunch.

Step 1: Find the crunchies. What are crunchies, you ask? They usually consist of a mixture of sev (small crunchy fried noodles), lentils, and puffed grains. They come in bags like the ones in the picture above. We found them by sheer luck at the local fruit shop. If you have a nearby Indian or Asian market though that would probably be a good place to start looking. In a pinch, you could substitute any sort of crunchy noodle or unsweetened cereal, seasoned with some turmeric and chile powder.

Step 2: The content. This step is open to interpretation. Basically, you need something to put the crunchies on. I prefer to roast a starchy veg of some sort (potato, squash, chick peas) tossed in olive oil and curry paste (I use Patak's Jalfrezi paste), but you could also boil potatoes and season them after the fact, or in a pinch, you could even get away with tossing a (rinsed and drained) can of chick peas with oil and spices (cumin, corriander, curry powder, chile).

Step 3: Assemble. Let the veg come to room temperature (if it's not there already) and mix with fresh cilantro, lime juice, and yogurt. Top with a bit more yogurt, tamarind sauce and crunchies.

Here's an example to give you an idea of numbers (this serves 2 as a meal and 3-4 as a side/snack):

The Veg:

1 small - med butternut squash, peeled and chopped into 1" cubes
1 can chickpeas, rinsed and drains
3-4 tbsp curry paste
3-4 tbsp olive oil

In a roasting tin, mix all four ingredients together. Roast at 375 for an hour, or until the squash is soft and has a bit of color.

The Chaat:

1 recipe veg at room temp
1/2 - 2/3 cup + 2 tbsp plain yogurt (or more if you prefer)
large handful cilantro
juice of 1/2 a lime
1/2 cup crunchies
tamarind sauce

Put the veg in a bowl and mix with 1/2 cup yogurt, cilantro and lime juice. Top with crunchies, remaining yogurt, and tamarind sauce.

This is an excellent way to use up leftover potatoes and the like.

LinkWithin

Related Posts with Thumbnails