
This is what became of the noodles that got nixed from the miso soup a few days ago. They met up with the kale that had been idling in the fridge for about a week, and turned into an NY Times recipe I'd been eyeing for some time.
As usual I was missing a few ingredients, but I think it came out pretty well:
1 bunch kale (oh, alright: 3/4 lb -ish)
1 hunk of gruyere chopped into 1/2" cubes
1/2 a lemon
3/4 lb soba noodles--maybe a little less
1/2 tsp dried sage leaves (fresh would be better if you have it, I didn't)
1 onion, chopped,
2 green onions chopped (again, if you look at the original recipe it suggests 2 leeks--I have no doubt 2 leeks would be better, but all I had was an onion and green onions)
1 tbsp butter
1 tbsp olive oil
Salt and pepper
1. Begin heating a large pot of water. Meanwhile, heat the butter and oil in a large, heavy nonstick skillet over medium-low heat. Add the onion(or leeks) and sage, and cook, stirring often, until they begin to soften, about three minutes. Add 1/2 teaspoon salt, and continue to cook, stirring often, until the onions/leeks are tender, about five minutes. Remove from the heat.
2. When the water comes to a boil, add a generous spoonful of salt and the kale. Boil for four minutes, until tender but still bright. Using a slotted spoon or a skimmer, transfer to the pan with the onions/leeks and stir together. Keep warm over low heat.
3. Bring the water back to a boil, and add the pasta. Cook al dente (5 minutes for soba). When the pasta is al dente, add 1/2 cup of the cooking water to the pan with the kale and leeks/onions, then drain the pasta and toss in the pan or in a warm pasta bowl with the onions/leeks, kale and the cheese, and a squirt of lemon juice (about 1/4 lemon should do it, you can add more later if need be). Serve at once with freshly ground pepper.
There is no lemon in the original recipe--but to me lemon and kale (especially when paired with a chicken-ish herb like sage) are a match made in heaven. The original recipe also recommend fresh parmesan. I didn't have any, and Danish blue cheese seemed like overkill, so I skipped that, added a little more gruyere, and plenty of pepper. Its possible that with the parm you wouldn't need the lemon. Garlic is a thought too. Feel free to experiment.
Monday, December 13, 2010
Pics and Noodles as Promised
Thursday, December 9, 2010
The end of an era
It's true. I have parted ways with my dream kitchen (*sniff*). The reason being that I moved back to Montreal and the kitchen, despite my begging and pleading, stayed in Seattle. Oh well. I am told that the chef makes the kitchen, rather than the other way around, but that doesn't help the fact that I really miss my island, my double sink, and my garberator, but such is life. (The daunting hunt for a Montreal apartment with a Seattle kitchen begins this spring...).
For now here's a list of food related lessons I learned while living in the Northwest:
1. Winter greens, spinach, chard, kale, are hugely underrated. They're quick to cook, versatile, and with appropriate spicing, they can beef up (no pun intended) just about any dish: Pasta, soup, fritattas, casseroles, sautes--even on their own as a side they're pretty tasty. And they're available (and fresh!) all year round.
2. IPAs are damn good beers when done right. 'Nuff said.
3. Recipes are really just suggestions, and there's no sense in buying an acorn squash when you have a delicata squash sitting in your pantry (especially when it's a 15 min. drive to the nearest grocer that will have *any* squash).
4. Recycle. The last of the grilled meat makes a good fritatta filling, cooked veggies and cob salads were meant to be, and just about *anything* can be made into a pizza topping. Also, the line between sauces and salad dressing is a fuzzy one: I cross it regularly.
5. The freezer is your friend. Not only for obvious stuff like chicken broth and tomato sauce, but also for serrano chiles (if you chop them while frozen then they are less likely to burn you), rotting bananas (freeze 'em until you get enough to make a loaf).
6. Speaking of loaves (and muffins): Stop buying them at the grocery store! It's cheaper and healthier to make your own, and a good way to use up surplus veggies (zucchini, squash, sweet potato etc.). Once you buy all the basics (flour, baking soda etc.) all you really need are eggs and butter, and in a pinch you can sub in applesauce, pumpkin puree, or oil, or some mixture thereof for the butter.
So, while I am glad to have my bakeries, cheese shops, ethnic food, and fruiteries back, a little part of me will miss cooking everything myself, because towards the end, I was starting to really enjoy it. Maybe I'll find the perfect kitchen here in Mtl. and get the best of both worlds.
In the meantime, here is something you can cook with minimal culinary equipment, but you will need a Miso source (I found mine at the Fruiterie down the block--Thank You Montreal!).
Instant Umami
(makes 2 servings)
This was meant to be a combination of this recipe and this one. It ended up being more like the first one, with mushrooms added. I decided noodles, tofu, and mushies was a bit much for a simple soup.
These are the amounts I used, you can tweak it however you want though:
2 c broth (I used chicken, veggie would work fine though)
1 c firm tofu, cut into 1/2" cubes
1/4 c green onions sliced thin
1/2 c mushrooms, sliced thin
1 1/2 c spinach, rinsed and chopped
2 Tbsp red miso paste (or to taste)
In a small pot, add the broth and 1 cup of cold water, cover and bring to a boil.
Once boiling, lower the heat, and add all other ingredients.
Cook over medium-low heat for about 10 minutes, until spinach is wilted, mushrooms are cooked through, and miso paste is dissolved. Make sure that the soup does not come back to a boil after the ingredients have been added.
The next version will have noodles. And pictures. I promise.
Wednesday, August 4, 2010
Q: What's halfway between Greece and Morocco?

A: I don't know but they make excellent salad.
Ever since seeing chickpea salad in the salad bar at the grocery store, I had been craving it. The salad I was actually craving was a spicy, dry Moroccan chick pea salad that I had at a restaurant once, but I couldn't find similar recipe online. Instead, all the recipes I saw seemed to have a strong Greek influence going on. So I got creative, I took a little bit of column A, and a little bit of column B. This was what I came up with:
Moroccan/Greek Chickpea Salad
Ingredients:
Salad:
2 cans chickpeas, drained and rinsed
1 - 2 cups chopped tomatoes (I used heirloom cherry tomatoes and halved them)
1 cup peeled cucumber, chopped into 1/2" dice
1 roasted red pepper (you can roast your own, or buy a jarful)
Spinach
1/2 cup crumbled feta cheese
A small handful of chopped fresh herbs (I used cilantro, but basil. parlsey or mint would all work)
Dressing (this is Delia's harissa dressing):
4 fl oz (110 ml) extra virgin olive oil
1 rounded teaspoon cayenne pepper
2-3 level tablespoons ground cumin
2 heaped tablespoons tomato purée (or paste)
4 tablespoons lime juice
First, in a bowl or cup, mix together all the ingredients for the dressing and let stand (the cumin/cayenne flavors will become more intense over time)
Now, in a large bowl, mix the chickpeas, tomatoes, cucumbers, and roasted peppers. Next, add enough dressing to coat all the veggies, and salt and pepper to taste (be generous with the salt, the tomatoes and cucumbers like it!). Finally mix in a handful of spinach leaves and garnish with feta and herbs.
At this point, you can either serve it as it is, or, over a bed of spinach. It's best not to mix all the spinach in though, as it will wilt. I just added a handful for color and texture purposes.
As you've probably guessed, this is a use-up-all-the-leftovers recipe. Other things that would work well in it include red onions (chopped finely), olives (black or green), watercress or arugula (in place of spinach), any other veggies that can be put in salad without being cooked, or if you have cooked potatoes in the fridge, those might work well too. Experimentation is a good thing.
Thursday, July 15, 2010
A Tale of 3 Curries

The Ingredients
Spiced Cabbage Salad:
* 4 cups shredded green or Savoy cabbage
* 1/3 cup finely chopped shallots
* 3 green serrano chiles, seeded and minced
* 6 fresh or frozen curry leaves or 1 tablespoon dried curry leaves
* 1 teaspoon salt
* 1/4 teaspoon turmeric
* 1 teaspoon ground cumin
* 2 tablespoons fresh lime juice
* 2 tablespoons fresh or frozen grated coconut
Katchhi Village Potato Curry:
* 2 tablespoons vegetable oil
* 2 teaspoons minced garlic or garlic mashed to a paste
* 1 pound potatoes, peeled and cut into 1/2 inch cubes
* 1 cup finely chopped shallots
* 1 cup chopped tomatoes
* 2 green serrano chiles, seeded and chopped
* 1/2 teaspoon turmeric
* 1/2 teaspoon black mustard seeds
* 1 teaspoon round cumin
* 1 teaspoon ground coriander
* 1/4 cup water
* 1 teaspoon salt, or to taste
Kerala Fish Curry:
* 2 cans (213 g each) of Sockeye salmon or mackerel, drained
* 1/2 an onion or 2 shallots, chopped
* 1 teaspoon minced ginger
* 2 teaspoons minced garlic
* 1 tablespoon of oil
* 2 teaspoons tumeric
* 1 1/2 teaspoons cumin
* 1 teaspoon corriander
* 6 to 8 curry leaves
* 4 green serrano chiles
* 1/4 teaspoon black pepper
The Chopping and Measuring
1. Begin by chopping all the common ingredients (garlic: 4 tsp total, ginger: 1 tsp total, chiles: 9(!) total, shallots/onions: about 2 cups total, potatoes, cabbage). Chop each ingredient and place in a separate bowl.
2. Next, measure out the spices. It's ok to mix all the dry spices for an individual recipe ahead of time, as they will be added at the same time.
3.Other prep work: make sure you have the canned ingredients (fish, tomatoes etc.) on hand to avoid going on cupboard diving expeditions at the last minute.
The Cooking
The potato curry will take the longest to cook, so start it first, followed by the cabbage, then do the fish last, as it cooks in less than 10 minutes.
Potatoes:
1. Heat the 2 tbsp of oil in a wok or wide pot over medium heat. Add 1 teaspoon garlic and cook for a minute, then add the potatoes and 1 cup of shallots/onions. Stir-fry for several minutes, until the shallots have softened, pressing the potato cubes against the surface of the hot pan.
2. Next, add the chopped tomatoes, 3 chopped chiles (you can be approximate here), the pre-measured spices (turmeric, mustard seeds, cumin, coriander), and the remianing 1 teaspoon garlic and stir to blend. Add the water and salt and bring to a boil. Cover tightly and simmer vigorously until the potatoes are just tender, about 20 minutes. Check regularly to make sure there is enough liquid and that nothing is sticking; add a little more water (or canned crushed tomatoes) if necessary.
If you are serving this with Naan from the grocery store ( frozen), this is a good time to start preheating the oven.
Cabbage:
1. While the potatoes are boiling, put the shredded cabbage in a medium heavy pot with the 1/3 cup shallots/onions, approx. 2 chiles, and the cabbage spices (curry leaves, salt, turmeric, and cumin). Place over medium-high heat, cover and cook for 2 to 3 minutes. Give the pot a quick stir, cover again, and lower the heat to medium.
2. Simmer until the cabbage is cooked and tender, about another 10 minutes, depending on your cabbage and how finely it is shredded. Add the lime juice and coconut and stir to mix well. Let cook for a minute or two, uncovered, then cover and remove from the heat.
At this point, the potatoes are probably getting close to done. If so, take them off the heat and cover them, otherwise, they can finish cooking while you cook the fish. You can also stick the Naan (if using) in the oven now.
Fish:
1. In a small to medium pot, heat 1 tbsp oil on medium heat. When the oil is hot, add the rest of the garlic (2 tsp), and the ginger (2 tsp). Turn the heat to low, and cook, stirring constantly for 1 -2 minutes.
2. Next, add the spices for the fish (tumeric, cumin, corriander, curry leaves) and the remaining serrano chiles (about 4 chiles worth). Stir until mixture is fragrant (2 min or so).
3. Add the fish, turn the heat up to medium, and cook, stirring for at most 2-3 minutes, until fish is heated through and coated with the spice mixture. (I told you it was quick!)
Pull the Naan out of the oven. The potatoes should be done now as well. If they have burnt a little and stuck to the bottom of the pot, leave them to sit off the heat covered for a minute (the steam will unstick them).
Congratulations. You now have a 3 course Indian meal, complete with a side of Naan, ready to serve, and you've timed it perfectly. Nothing is overcooked, and everything is still warm. Enjoy!
PS Clean up for this really isn't that scary either: if you've done it right, you should have a bunch of bowls and measuring cups (which can go in the dishwasher), and a few pots.
Serving: Serves about 4 healthy appetites (or 2 + lunches for the upcoming week).
Tuesday, July 13, 2010
Culinary Abstraction: The Story
I got the idea for this post from a discussion I was having earlier today in which I was vehemently disagreeing with the (somewhat preposterous) claim that a good way to improve one's coding skills is to read books about writing code. In the process of ranting about how absurd this claim was I found an interesting connection between cooking and coding.
The term "abstraction" is commonly used by programmers. It means that instead of diving in and trying to write the whole program in one fell swoop, you break it down into little pieces, write and test each of these and once you have all the little pieces you need, and are (somewhat) certain that they work correctly, you assemble them into the bigger program you were initially trying to write. I rely on abstraction a lot to keep things from getting (too) complicated when I write code but what I realized this morning is that I also abstract my cooking.
In fact, I think culinary abstraction is a brilliant way to go if you (like me) tend to encounter timing and coordination issues when cooking multiple dishes at once. Here's why: have you ever (bear with me here) watched Martha Stewart cooking some five-course meal and thought "well, yeah, its easy when everything is pre-chopped and pre-measured and layed out in nice little pastel-coloured ceramic bowls". Well guess what, that's culinary abstraction: get all the little things figured out first, then, all you have to do is assemble the pieces.
One could argue (lacking a staff of 20 like Martha has), that it doesn't make a difference if you chop everything now, or just do it as you go, however, I will once again return to the code analogies to explain the difference.
The "holy grail" of code-writing is reusability: If you can write one piece of code, and use it for several tasks (rather than writing new code each time) you not only save yourself the time it takes to write the code but also to maintain and debug it.
Cut to the kitchen. Two nights ago, on my own, I made a three-course Indian meal (recipes to come in a later post). Sounds like a lot of work, but in fact, it didn't take me more than an hour and a half to make. What I did was this: First I figured out the quantities of garlic, serrano chiles, ginger, onions etc. that were needed for each recipe and chopped them all (if you're very Martha, and have a major surplus of bowls, you could divide each ingredient up into portions for each recipe...but I just left each one in a bowl and scooped out the appropriate amount as needed). Next, I measured spices. These I did do by recipe, putting all the spices for the fish curry in one bowl, the potato curry in another, and the cabbage in a third. Finally I prepared "recipe-specific" ingredient (cabbage, potatoes, fish).
At this point, everything is ready to be added to the pot, and its just a matter of timing, which, when you're not distracted by last minute chopping/washing/mixing/measuring etc., is quite simple to manage.
The point here is that if you chop/wash/measure all the ingredients first, you know you have exactly what you need, so you're free to focus on the actual *cooking* part, and, like coding, not only do you save yourself the pain of last minute surprises ("Crap, we don't actually have any onions.."), you also save yourself having to wash the cutting board multiple times.
The point here is that a good part of cooking, like coding, is just getting your thoughts in order. And when you approach a new project in either domain, the best thing you can possibly do is fight the urge to dive headlong into it immediately and instead take some time to get organized (it will likely save you time in the long run).
Friday, June 25, 2010
Asparagus and Friends Part 3: Asparagus, Mushrooms, and Gruyere
I cheated on the crust, and used a frozen crust instead of making my own and substituted leeks for ramps, since that was what was idling in the fridge. I also supplemented my morels with shitakes (because $20.00/lb was a bit out of my price range). Overall though, this makes a damn fine quiche. The gruyere is a must. Don't skimp on that.

Asparagus Morel (or Shitake) and Ramp (or Leek) Quiche
(makes 6 servings)
Printable Recipe
Ingredients:
Crust:
2 cups cooked brown rice
1/4 cup gruyere (grated)
1 egg
-or-
1 frozen pie crust from the store
Quiche:
4 eggs
1 cup milk
1 cup gruyere (grated)
1/2 pound morel mushrooms
1/2 pound asparagus (cut into 1-inch long pieces and steamed)
3 ramps (chopped)
salt and pepper to taste
Directions:
To make the crust:
1. Mix the rice, cheese and egg in a bowl.
2. Press the rice mixture into a pie plate, about 1/4 inch thick.
3. Bake in a preheated 450F oven until the edges and bottom just start turning golden brown, about 5-7 minutes.
To make the quiche:
4. Mix the eggs, milk, cheese, mushrooms, asparagus and ramps in a bowl and season with salt and pepper.
5. Pour the egg mixture into the pie crust.
6. Bake in a preheated 375F oven until golden brown and set in the center, about 30-35 minutes.
Thursday, June 17, 2010
Asparagus and Friends Part 2: Asparagus on the Grill
The biggest hazard when it comes to grilling asparagus is that it has a terrible tendency to slip through the grate on the grill, at which point it is no longer edible, *and* you have to disassemble the BBQ to extract it. However, on this particular evening, I had a flash of brilliance of Fine-Cooking-Tips-and-Tricks proportions: I took the fish-grilling basket, and chucked the asparagus in there, closed it up and put it on the grill. It worked perfectly. There was no asparagus-spear herding with the tongs or the spatula, just flip it over a couple times while your other grillables are cooking and there you have it: grilled asparagus, no fuss, no bother, no grill pan.
A word of warning though (well, 2 actually). I failed to toss my spears with salt and olive oil before grilling (I was *that* lazy), which probably would have made for a tastier result (we were doing Asian style chicken thighs with the asparagus, so I drizzled it with a soy-and-hoisin sauce, which basically had the same effect. Also, I recommend not stuffing *too* much asparagus into the fish-basket. Ideally you want each spear to be expose to the flame on at least one side (so 2 layers of asparagus at most), otherwise the ones in the center don't cook very well.
Grilled Asparagus Spears and Five-Spice Chicken Thighs with Soy-Vinegar Sauce & Cilantro
The chicken thighs are from The Wonder Issue of Fine Cooking. The ingredient list is nothing special, but somehow this is one of the most Asian-tasting recipes for Asian style chicken I've ever tried (and, its a mix, marinade and grill sort of thing, which makes it that much better).

Servings: Serves four to six (and great as left-overs).
Ingredients
2 tablespoons Chinese five-spice powder
1 tablespoon plus 1 teaspoon dark brown sugar
1 teaspoon garlic powder
3/4 teaspoon kosher salt
2 tablespoons soy sauce
2 teaspoons rice vinegar
1 teaspoon Asian sesame oil
1/4 teaspoon crushed red pepper flakes
2-1/2 pounds boneless, skinless chicken thighs (about 8 large, 10 medium, or 12 small), trimmed of excess fat
2 tablespoons vegetable oil; more for the grill
3 tablespoons chopped cilantro
Directions
1. Mix the five-spice powder, the 1 tablespoon sugar, the garlic powder, and the salt in a small bowl. In another bowl, mix the soy sauce, vinegar, sesame oil, red pepper flakes, and remaining 1 teaspoon sugar.
2. Put the chicken in a shallow pan, drizzle with the vegetable oil, and toss to coat evenly. Sprinkle the spice mixture over the chicken; toss and rub to coat thoroughly.
3. Prepare a hot charcoal fire or heat a gas grill with all burners on medium high for 10 minutes. Clean the hot grate with a wire brush and then lubricate it with an oil-soaked paper towel. Put the chicken on the grate and grill (covered on a gas grill or uncovered over a charcoal fire) until one side has dark grill marks, 5 to 6 minutes for large thighs or 4 to 5 minutes for medium and small thighs. Turn and continue to grill until well marked on the other sides and cooked through, 5 to 6 minutes longer for large thighs or 4 to 5 minutes for medium and small thighs.
4. Move the thighs to a serving dish. Drizzle with about half of the soy mixture, sprinkle with the cilantro, and toss to coat. Let rest 4 to 5 minutes, tossing once or twice. Serve hot, warm, or at room temperature, with the remaining soy mixture passed at the table.
Asparagus
Ingredients:
1 lb asparagus spears
Salt
Olive Oil
Optional:
1 tbsp hoisin sauce,
1 tsp soy sauce
Toss the spears with salt and olive oil, place in a fish grilling basket, and grill along side the chicken, if you want, you can drizzle it with the soy/hoisin mix afterwards.
Monday, June 14, 2010
Asparagus and Friends Part 1: Asparagus and Smoked Salmon
Asparagus with Smoked Salmon Ravioli in a Rose Sauce
Really, the asparagus was just a side dish here, we didn't do anything fancy to it, just popped it in salted water to boil for a couple minutes before draining it and serving alongside the ravioli. But thats part of the beauty of fresh asparagus: smetimes the best thing to do with it is absolutely nothing. Cook it in the simplest possible way, and serve it (don't worry -- we did more interesting things with it too).

This recipe is adapted from here. We used smoked salmon ravioli, which we had bought at the market with the asparagus, however, if you can't find that, probably penne with some chunks of smoked salmon thrown in would work well too.
This recipe made about twice as much sauce as
Ingredients
Pasta:
1/2 lb Smoked salmon ravioli
OR
1/2 lb penne and 1/2 cup smoked salmon
Sauce:
1 tablespoon butter
1 small finely diced onion
1/2 cup diced smoked salmon (if not using ravioli)
2 fluid ounces vodka (or any liquor: we had no vodka and instead used brandy)
1/4 cup heavy whipping cream
1 cup crushed tomatoes
salt to taste
ground black pepper to taste
1 pinch ground nutmeg
1/4 tsp red pepper flakes
Asparagus:
1/2 lb fresh asparagus rinsed and stemmed
Directions
1. In a large saucepan saute butter and onion with smoked salmon (if using). Once the pan begins to lightly smoke, pull saucepan away from heat source and add the Vodka (or other liquor).
2. When the Vodka has burned off, return the sauce to heat source and mix in the crushed tomatoes and heavy cream (you can tweak the cream to tomato ratio here depending on personal preferences).
3. Season sauce with salt, pepper, nutmeg, and red pepper flakes. Reduce sauce to desired consistency; serve.
As for the asparagus, the prep is pretty easy, but the key is timing. It may seem difficult to mess up a simple side like boiled (or steamed) asparagus, but believe me, I've done it. Put the asparagus in to early, and it either ends up limp and overcooked (if you leave it in too long), or worse yet, cold (if you take it out to early). For this recipe, I put a pot of water up to boil for the asparagus at the same time I put up the water for the pasta. Since both ravioli and asparagus cook very quicky, I waited until the sauce was mostly done (in the reducing stage) and put the pasta and aspargus in then. I kept an eye on both, and as soon as the asparagus was done (usually no longer than 5 minutes if the water is boiling when you put it in), drained it, put it back in the pot, and covered it (to keep it warm). Then I drained the ravioli, assembled, and served.
Sunday, June 13, 2010
Baked Pasta Part 2
Having tried Jamie Oliver's baked pasta, last week (a lovely simple chez-piggy-in-a-casserole-dish sort of fare), we decided to try David Rocco's this week. David Rocco's baked pasta is more guy-food: tomatoes, tonnes of cheese (including smoked mozzarella or scamorza if you can find it), sun-dried tomatoes, more tomatoes, olives, crushed red peppers, and eggplant make it a hearty stick-to-your ribs sort of meal (so it's not surprising that it would be Dan's top choice after a day of running errands and biking):
PASTA AL FORNO

Ingredients
1 lb rigatoni pasta (450g) (we actually used whole wheat penne rigatoni -- which worked pretty well)
4 tablespoons extra virgin olive oil (60ml)
2 garlic cloves, chopped
1 large eggplant, cubed
15 infornate olives, pitted and chopped (I used black semi-dried)
10 large sun-dried tomatoes, chopped
2 dried chili pepper, crushed (optional, but strongly recommended)
1 jar of tomato puree (750ml)
0.8lb freshly grated mozzarella (400g)
smoked scamorza cheese, as much as desired, roughly chopped (we couldn't find this, so instead used 1/2 lb plain mozzarella (grated) and 1/2 lb smoked mozzarella (chopped into chunks) which worked quite well),
freshly grated parmigiano cheese for sprinkling
salt to taste
To start your Pasta al Forno:
Preheat oven to 400 degrees Fahrenheit.
While the rigatoni cooks in salted boiling water, prepare the sauce. In a saucepan heat up olive oil and sautí garlic, eggplant, olives, sun-dried tomatoes and chili peppers for a few minutes. Add tomato puree and salt. Let cook for approximately 10 minutes on medium heat.
Lightly oil a large (8x12") baking dish, set aside. Drain rigatoni, and mix with sauce in a large bowl. Add the mozzarella and smoked scamorza (or smoked mozzarella)--the cheese will start to melt as soon as you add it, so you have to be a bit quick here--mix just long enough to get the cheese well-distributed throughout the mix (30 sec. tops, otherwise all the cheese will melt and end up in one large blob on your spoon). Now pour the whole mixture into the baking dish, sprinkle with parmesean, and pop it in the oven.
Alternatively, you can do the layering thing: drain the pasta, add to the saucepan with the sauce, sprinkle with some parmigiano and cook for another 30 seconds. Place half the rigatoni in a baking dish, adding a layer of half of the mozzarella, half of the scamorza and another sprinkle of parmigiano cheese over the pasta.Add the remaining rigatoni, and follow with a final layer of all the cheeses.
Bake for 20 to 30 minutes or until golden brown.
Per 4 persone (again: 4 ravenously hunrgy young males--this is a lot of pasta).
Sunday Night Salad: One Day Early
I have never been a big potato salad person. Potatoes, unless they're really nice fresh potatoes, have always tasted dull and starchy to me, and the idea of dousing them in mayo and topping them with bacon to make them more interesting seemed to just make the whole dish even heavier, hardly the desired effect of a summer salad meant to go with things like burgers and grilled sausages. At any rate, up until recently I was pretty strongly anti-potato salad. Then Jamie showed me the secret, or rather, he showed Dan the secret, and Dan converted me. A word of warning: this recipe, from Jamie Oliver's new Jamie's Food Revolution (aka Ministry of Food),
The Secret of Good Potato Salad

Ingredients:
1¾ Pounds Baby Potatoes (or any good quality potato: we used 3 red and 3 white from the produce bin)
6 Tablespoons Extra Virgin Olive Oil
2 Tablespoons Lemon Juice
Sea Salt
Fresh Ground Pepper
Fresh Chives (I throw in dill or fennel tops too)
1 Lemon, zest
¼ Cup Natural Yogurt
Smoked Bacon (I like to use pancetta)
Cook Potatoes: Bring a pan of salted water to a boil. Peel the potatoes, chopping large ones in half (or chop into 1" cubes if using larger potatoes). Leave the small potatoes whole. When the water is boiling, add the potatoes to the pan and bring back to a boil for about 10 to 15 minutes. While they're cooking, in a small pan, over medium heat, cook slices of smoked bacon (or pancetta bits) in a splash of extra virgin olive oil, set aside on a paper towel to drain excess oil when done. Test potatoes with a knife to make sure they are cooked through. Drain the potatoes and place them in a medium bowl.
Dress Potatoes: Mix the extra virgin olive oil, lemon juice, sea salt, and fresh black pepper. Stir well. Toss the hot potatoes in the dressing (Jamie says it's important to do this while the potatoes are still hot, to get the texture of the sauce right). Finely chop fresh chives (and any other herbs you're using) and sprinkle them over the potatoes. Toss the potato salad with the zest of 1 lemon and ¼ cup natural yogurt. Next, crumble cooked bacon or pancetta on top and serve.
Monday, June 7, 2010
Wheels, more wheels, fenders...food therapy
For my money, there's nothing more theraputic than tomato-based pasta sauces. Plop the whole lot in a baking dish with alternating layers of basil, freshly grated parmesean and gorgeous, salty fresh mozzarella and chuck it in the oven, and you've got all the requirements of theraputic food: richness (parmesian), gooeyness (mozz), a hint of spice (crushed red chiles in the tomatoes) etc. As far as I can tell, and Jamie Oliver's explanation seems to agree, this is the Italian version of mac 'n cheese, which is about as comfort-food-ish as you can get. It also makes a refreshing lunch when eaten cold.
Its really dead simple to make (we wussed out and did not put equal parts mozz and pasta into the mix, instead we used one large ball of fresh mozz, about 1/2 lb. the dish could probably do with a little more, but was certainly not bad with only this much). I couldn't find the orecchiette either (next time I see it, I'm just going to buy it, because it is never there when I am looking specifically for it), I used large-ish bow ties instead, and they worked quite well. I think the real key is the quality of the pasta, rather than the shape...although noodles might be weird.
baked pasta with tomatoes and mozzarella (pasta al forno con pomodori e mozzarella)

Servings: Jamie claims it feeds 4. By 4 he means 4 ravenously hungry 21 yr old males. So far it has served us for 2 dinners, and 4 lunches, and probably has about 2 more servings left to go.
Ingredients:
• sea salt and freshly ground black pepper
• extra virgin olive oil
• 1 white onion, peeled and finely chopped
• 2 cloves of garlic, peeled and finely sliced
• 1 or 2 dried red chillies, crumbled
• 1.5kg ripe tomatoes or 3 x 400g tins of good-quality plum tomatoes (due to the fact that it is June and we don't live in Italy, we used canned)
• a large handful of fresh basil leaves
• optional: 1 tablespoon red wine vinegar
• 400g dried orecchiette
• 4 big handfuls of freshly grated Parmesan cheese
• 3 x 150g balls of mozzarella
Preheat your oven to 200ºC/400ºF/gas 6 and put a large pot of salted water on to boil. To an appropriately sized pan add a couple of lugs of good extra virgin olive oil, your onion, garlic and chilli and slowly fry for about 10 minutes on a medium to low heat until softened but without any colour. If you’re using fresh tomatoes, remove the core with the tip of a small knife, plunge them into the boiling water for about 40 seconds until their skin starts to come away, then remove with a slotted spoon or sieve and remove the pan from the heat.
Put the tomatoes into a bowl and run cold water over them, then slide the skins off, squeeze out the pips and roughly chop. Add your fresh or tinned tomatoes to the onion and garlic, with a small glass of water. Bring to the boil and simmer for around 20 minutes. Now put them through a food processor or liquidizer to make a loose sauce. Tear your basil leaves into the sauce and correct the seasoning with salt, pepper and a little swig of red wine vinegar.
When the liquidized sauce tastes perfect, bring the water back to the boil. Add the orecchiette to the water and cook according to the packet instructions, then drain and toss with half of the tomato sauce and a handful of Parmesan. Get yourself an appropriately sized baking tray, pan or earthenware dish and rub it with a little olive oil. Layer a little pasta in the tray, followed by some tomato sauce, a handful of grated Parmesan and 1 sliced-up mozzarella ball, then repeat these layers until you’ve used all the ingredients, ending with a good layer of cheese on top. Pop it into the preheated oven for 15 minutes or until golden, crisp and bubbling.
Pics to come.
Wednesday, June 2, 2010
Bikes and Beer in Portland OR
We rented our bikes first thing sunday morning, and rode off to begin our day at Doug Fir Lounge, one of Portland's best brunches according to ChowHound. We were not disappointed. I had a delicious scramble with sharp cheddar, onions, delicious potatoes and more ham than you could shake a stick at, and Dan had a vegetable hash, with spinach, zucchini, tomatoes and perfectly poached eggs on top, and of course, bottomless coffee. Convenienly, Doug Fir lounge is located in the Hawthorne neighborhood, which is a lovely area to wander in while you're trying to digest brunch enough so that you can get back on your bike and ride without cramping up. While wandering, we found a myriad of cool second hand stores, including Next Adventure, which has a basement full of affordable, if pre-loved, sporting gear (we found a helmet for Dan and biking shoes for me).
We rode about exploring various neighborhoods for the better part of the afternoon, and having missed lunch (brunch was fashionably late, since most brunch joints in Portland serve brunch until 3pm or later on weekends), decided an afternoon pint was in order. I did not realize until now how much I missed bike-friendly cities (Portland is supposedly second only to Montreal in terms of bikeable North American cities). At any rate, what caused me to remember was the sight of rows and rows of bike racks (mostly full) outside of New Old Lompoc microbrewpub. Somehow it just seemed much more inviting than the expanses of parking lot that tend to surround everything in Seattle. We found an open rack and headed in. Since it was late afternoon and we hadn't eaten since breakfast, we went easy on the beer, ordering only a sampler to share. While all of Lompoc's beers were quite nice (their light beers had that lovely refreshing "cottage" taste to them), the winners were definitely the hoppier options. Both the Imperial Pale Ale C-note, and its lighter cousin Centenial, the India Pale Ale had a lovely full hoppiness about them that stood up fine on its own, but worked well with food too. Perhaps their most interesting (and judging by surrounding tables) most popular beer, was LSD (Lompoc Strong Draft), which, in their own words, is:
A Portland Classic! This strong ale has a deep mahogany color and is crafted with seven different specialty malts. A touch of smoked malt gives it a complex aroma and incredible flavor. LSD is also generously hopped with six hop varieties to help create an awesome beer. 6.9% abv. 58 IBU
Somehow, the smokiness of the LSD gave it a tinge of esspresso flavor, which made it all the much more interesting.
Onward to dinner. Dinner was the second time in my life that I've been able to eat at a restaurant reviewed by Food and Wine Magazine (the first was a gourmet pizza place in Vancouver BC). Pok Pok is a low-key little place on Division St. (also around Hawthorne), supposedly started by a guy grilling in his backyard. The kitchen looks like it might once have been a foodcart, and the restaurant itself is a hodge-podge which blurs the line between inside and outside. At one point in the evening, a sudden cloudburst spang itself on us, and we watched as customers and waitstaff alike made a mad dash between the "indoor" part and the "covered outdoor part" through a narrow passagway whose eavestroughs had been hopelessly overwhelmed.
Anyways, on to the food. We started with G&T's and fried papaya fritters across the street at Whiskey Soda Lounge, where we waited the supposed hour (actually much less) until our table was prepared. Then, we wandered over to Pok Pok. As soon as we sat down, the smells of the dishes passing by us told us this was a *can't go wrong* sort of place. We could probably have just told the waitress "you pick for us!" and it all would have worked out. Alas, the almost tropical weather convinced us to forgo the curries (which smelled awesome). Instead, we went with the grilled game hen, the La Vong fish (Dan's all-time favorite: pan-fried fish with tons of dill, and a bit of spice, served over noodles), an eggplant salad, and some sticky rice to sop it all up. It was all delicious. The game hen was juicy and moist, the eggplant salad (packed with herbs of all sorts) was bright and refreshing, and the fish was wonderful. Everything came with at least one, sometimes 2 sauces, which could be slathered over the sticky rice to make the flavors last even longer. We ended the meal with a totally decadent plate of sweet sticky rice, mango and condensed milk--which is a killer combo. Overall, a wonderful meal (and very reasonably priced). If you don't mind the wait (or if you have 5+ people so you can make a reservation in advance), I strongly recommend it. We had big plans to end the evening with one more Portland pint somewhere, but alas, it being Sunday night on the west coast, the two bars we tried had both already called last call by the time we wandered it at 11:30 pm (there are some parts of living out here that I will never get used to. Early bar closures on holiday weekends is one of them).
Besides running a few errands (returning bikes, buying beer etc.) We didn't do too much on Monday, as we wanted to get out in time to beat the traffic (or some of it at least). We did find time to wait the 1/2 hour for a famous Voodoo Doughnut. Dan tried cinnamon and I tried the classic old-fashioned. We decided we must not be doughnut-connaiseurs, because to us, both doughnuts tasted only marginally better, and a tad fresher, than the infamous Timbits we knew so well. Finally, on the way out of town, we hit the FoodCarts and loaded up on cheap Banh Mi (2 for $6) for the trip home, and lunch the next day. The Banh Mi, while not Montreal quality, were head and shoulders above Seattle Banh Mi in that their BBQ Pork was actually sliced thin, like cold cuts, and did require the gnawing and gnashing of teeth involved in eating a Seattle Banh Mi--oh and they had a magic sauce of some sort, and peppers, and pickled veggies.
A whirlwind tour of Portland, and I have no doubts we missed several gems, but at least we got there, and it certainly wouldn't take much convincing to get me to go back again.
Friday, May 21, 2010
Excuses, Excuses


My bike of 15+ years finally bit it a couple weeks ago, and what I had hoped to be a *recovery week* after a conference and a visit in T.O. was instead a week spent madly chasing anything with wheels. As luck would have it, this was also the week that the weather finally turned nice--and *everyone* was looking for bikes. After some fairly intense Craigslist-ing, I finally found a bike that suited my needs (the Cannondale), but ever the indecisive Libra, I continued to scour CL for a couple of days afterwards and that's when I found the Trek. It was listed at $175, and I talked them down to $125, at which point I really couldn't say no. And then there were two. On the bright side, next time one has to go to the shop, I won't be stuck waiting for the bus.
But anyways, enough about bikes, on to food. The other reason I haven't been cooking much (aside from getting stuck at work until all hours) is that Dan is OOK (out of kitchen) this week, and so there's only been one person to cook for most nights, which makes it hard to resist the leftovers/takeout/grazing option. The produce box came today though (containing leeks and rainbow chard and other exciting stuff) which meant I had to cook, otherwise all the veggies wouldn't fit in the fridge! We'd been acquiring a surplus of fennel and zucchini from past produce boxes, so I figured I'd use up some of that.
Fennel Barley "Risotto"

Our fennel is insane. I have never seen fennel with so many greens on it (the pile in the pic above came from two (two!) fennel bulbs. Despite putting handfuls of it into salads, I still can't seem to make a dent in it.
So when I made this, I decided to sub in fennel greens for parsley (I also used cooked the barley in straight chicken stock, rather than diluted chicked stock). The end result was a ok, but a bit dull. It needs an accent flavor of some sort, although I haven't quite figured out what yet (cheese, maybe? or pancetta...).
Ingredients
1-1/4 cups cups(300 mL) (300 mL) pearl barley
2 tbsp tbsp(25 mL) (25 mL) extra-virgin olive oil
1 small onion, diced
2 shallots, diced
2 small fennel bulbfennel bulbs, diced
2 cloves garliccloves of garlic, minced
1/2 tsp tsp(2 mL) (2 mL) salt
1/4 tsp tsp(1 mL) (1 mL) dried thyme
1/3 cup cup(75 mL) (75 mL) dry white wine
2-1/2 cups cups(625 mL) (625 mL) sodium-reduced chicken stock (I used 1 qt, but no water)
1/4 cup cup(50 mL) (50 mL) chopped fresh parsley (I subbed in fennel greens)
Preparation:
In saucepan, toast barley over medium heat, stirring often, until light golden and fragrant, about 5 minutes. Transfer to bowl.
In same saucepan, heat oil over medium heat; fry onion, fennel, garlic, shallots, salt and thyme until softened, about 6 minutes.
Stir in wine; cook, stirring, until almost no liquid remains, about 2 minutes. Stir in barley; cook, stirring, for 1 minute.
Add stock and 2 cups (500 mL) water; bring to boil. Cover, reduce heat and simmer, stirring occasionally, for about 30 minutes or until barley is tender and no liquid remains. Remove from heat; stir in parsley. Let stand, covered, for 5 minutes.
Serves about 6.
The real winner of the night though was this (another one from the "Recipes for Health series in the NYTimes):
Zucchini Pasta

If you can get past the slightly tedious process of peeling zucchinis into thin strips using a vegetable peeler, this is a really cool (and easy) recipe. Apparently you are supposed to cook it. I missed that step, and simply tossed the zucchini ribbons with the other ingredients, which worked perfectly well and had an air of fresh simplicity about it that seems unique to Italian cuisine. I tweaked the recipe a bit, forgoing the tomato sauce and adding instead fresh mint, basil and a few drops of red wine vinegar (I suspect with a punchier EVOO one could skip the vinegar, but I only had Costco EVOO, so I had to cheat and tart it up a bit).
3 zucchinis (or a combination of yellow and green zucchini)
2 tablespoons extra virgin olive oil
Kosher salt and freshly ground pepper
1 handful fresh basil (roughly torn)
1 handful fresh mint (cut into thin strips)
a few drops of red wine vinegar
1/4 shaved Pecorino cheese (more to taste)
1. Using a vegetable peeler, cut the zucchini into lengthwise ribbons. Peel off several from one side, then turn the zucchini and peel off more. Continue to turn and peel away ribbons until you get to the seeds at the core of the zucchini. Discard the core. You can also do this on a mandolin, adjusted to a very thin slice.
2. Toss zucchini with herbs, salt, pepper, evoo, cheese and vinegar.
Alternate 2: Cook the zucchini strips in two batches. Heat 1 tablespoon of the oil in a large nonstick skillet over medium-high heat. When it is hot, add the zucchini ribbons and 1/2 teaspoon kosher salt. Cook, tossing and stirring the zucchini, for two to three minutes, until softened and beginning to turn translucent. Adjust salt and add freshly ground pepper to taste, and transfer to a serving dish. Repeat with the remaining olive oil and zucchini. Serve, topping with herbs and freshly grated Parmesan if desired.
Yield: Serves four as a side, 2 as a main dish.
Thursday, April 29, 2010
Sunday Night Salad: the one where I come clean about my sources

I'm afraid I can't take any credit for this one recipe-wise. This one came direct from my mother's recipe files (even the addition of the radish). However, I will say that it makes a darn fine salad for 15 minutes work. I like to make it up right before bed and let it sit in the fridge overnight so the onion flavors soften and the vinegar makes the celery and broccoli a tad less crunchy. Anyways, without further ado:
Broccoli Salad
Serves about 4-6
Source: My mother, chef extraordinaire.
Ingredients:
• 4-5 cups fresh broccoli florets
• 1/2 cup raisins (I used golden raisins)
• 1/2 cup sunflower seeds (I used ones that were toasted, but not salted)
• 1/4 cup cooked, crumbled pancetta (about 6 slices)
• 1/4 cup of red onion, chopped
• 1/2 cup of celery,chopped finely
radishes might be nice (I used one small one, sliced thin)
Dressing:
• 1/2-3/4 cup mayonnaise
• 2 tablespoons cider vinegar (of course, I used 3)
• 2 Tbsp sugar
• salt and pepper
Preparation:
Combine broccoli florets, raisins, sunflower seeds, crumbled pancetta, chopped onion, radish, and celery in a large serving bowl. In a separate bowl or large cup, whisk together mayonnaise, vinegar and sugar. Add dressing to the salad and toss to mix well; chill thoroughly before serving.
A box and a burrito

So far we haven't done much exciting with it, besides mussels with the fennel (I'll post the recipe in a later post) and broccoli salad with the broccoli. Rumour has it there is rhubarb in next weeks box, which is very exciting!
The burritos didn't actually use much from the box--it was mostly a clean out the freezer sort of recipe. Whenever I make burritos, I end up combining ideas from about 4 different recipes. Sometimes it works, sometimes not. This particular time, I thought things worked out pretty well, and so I give you "Patchwork Burritos", needless to say, the recipe is quite versatile and substitutions are welcome.

Ingredients:
*2 chicken breasts cut into strips
*1 clove garlic chopped
*1 onion sliced
*1 poblano pepper, chopped
*1/2 a red pepper chopped
*1 jalepeno, seeded and chopped fine
*1 14oz. can chopped tomatoes with juice
*1 cup refried beans (I used refried black beans for extra flavor)
*2 tbsp oil
*1/2 cup uncooked rice (long grain is good)
*1 cup water
*2tbsp cumin
*1 tbsp mixed mexican spices (chili powder, cayenne, cumin etc.)
*1 tbsp chile powder
1/2 tsp cayenne/red pepper flakes (more if you like it hot)
Method:
In a large, deep frying pan (make sure you have a lid to fit it), heat the oil over med. heat, add garlic, onion and peppers and cook until they are fairly soft. Add the chicken, and saute stirring frquently, until it is no longer pink.
Now add tomatoes, water, spices, and rice, cover and cook for 20 min, or until the rice is thoroughly cooked, and most of the water absorbed. Once the rice is cooked, you can shred the chicken a bit with a fork to make it easier to eat.
Finally, stir in the beans, cook for another couple minutes until heated through, and serve on tortillas with lettuce, cheese, salse and sour cream (or yogurt in a pinch).
You can eat these like tacos (meaning put all the toppings *inside* the tortilla, wrap it and eat by hand) or like classic burritos (put only the filling inside the taco, wrap it, and then put the toppings on top, and eat with a fork and knife). The refried beans, as well as adding flavor, do a nice job of holding everything together so it doesn't ooze or explode on you.

The best kind of leftovers: homemade ones.
Thursday, April 22, 2010
Wine and Cheese
While the closest I could come with the beer was a bottle of St. Ambroise Oatmeal Stout (a Quebec microbrewery imported from Vancouver), I did manage to assemble a darn fine cheese tray, if I do say so myself.

This one consisted of organic apples from the produce box, the remains of a baguette from the night before, crackers, salami (from the amazing Italian deli on Commercial ave. in Vancouver), the last of a chunk of Cambizola (Camembert+Gorgonzola) that had been idling in the fridge and was more *Gorgonzola* than Camembert at this point, a nice sharp cheddar, an amazing goat cheese gouda that the grocery store was sampling and I couldn't pass up, and a spot of chutney from London. Its quite remarkable what you can find idling in the fridge sometimes.
The wine was not idling in the fridge. The wine was a long-awaited visit to Purple, a tres posh wine bar in downtown Seattle. What keeps me coming back there despite the poshness and the prices is their samplers: 4 2.5 oz. glasses of wine for $17 (which wouldn't be that exciting, except that allows you to try 4 different wines at once and compare and contrast them--which is my favorite part). Anyways here's what we tried:
I tried "The Farm" (these ones were supposed to be earthy, flowery etc.):
-Domaine Roc de Chateauvieux (France)
-Planeta (Italy)
-Alcance Carminiere (Chile) -- I love Carminieres. They taste like dark chocolate
-Chateau la Coustarelle (France)--This one, I kid you not, tasted like flowers, it was a little odd at first, but it grew on me
Dan tried "Vive Le France" :
-Jean-paul brun "terres-dorees" (Beaujolais)
-Domaines sarrail (vin de pays de la cite de carcassonne)
-Chateau Franc grand-dieu (st. emillion grand cru)
-Les Moirets (cotes du Rhone)
Then we shared "The Bullfighter" (Spanish reds):
-gotin "del risc" mencia--This one, IIRC, was pretty light, but it may just have been that it followed the flowery one
-san isidro cepas del zorro "dos ano" monastrell
-comcerc 'old vines' garnacha (carinena) -- delicious
-atalaya
My favorites were without a doubt the first batch. The earthy, pungent, floralness of them was delicious, and different from the type of wines I usually drink (rich Cabs or full fruity Shiraz). Had we not already stuffed ourselves with cheese at lunch, I would have definitely ordered a good creamy soft-ripened French cheese to go with it--but there's only so much cheese one can eat in a day (even when one has lived in Montreal).
Sunday, April 18, 2010
Sunday Night Salad: Double Feature
Roasted Vegetable Couscous Salad with Harissa-style Dressing
This one is a Delia Smith special, so it's a little involved (lots of chopping), but believe me, it's worth it, and is excellent as leftovers, so don't be timid about quantities (I usually make about a metric ton, and then live on it for a week). Delia's version involves sweating eggplants and blanching cherry tomatoes--I do no such thing. I just chop, roast and assemble.

Servngs: Delia says "Serves 4 as a main course or 8 as a starter". I say serves 2 for dinner plus about 6 lunches.
Ingredients
For the roasted vegetables:
1 small aubergine (eggplant)
2 medium courgettes (zucchinis)
1 lb (450 g) cherry tomatoes,
1 small red pepper, de-seeded and cut into 1 inch (2.5 cm) squares
1 small bulb fennel, chopped (save the feathery greens at the top and throw them in too)
1 large onion, sliced and cut into 1 inch (2.5 cm) squares
2 fat cloves garlic, crushed
2+ tablespoons fresh basil leaves, torn so that they stay quite visible
3 tablespoons extra virgin olive oil (you may need more if you use two tins to cook the veggies)
2 oz (50 g) pitted black olives, chopped
1 heaped tablespoon capers, drained
salt and freshly milled black pepper
For the couscous:
10 oz (275 g) medium couscous
18 fl oz (500 ml) vegetable stock or water
4 oz (110 g) firm goats' cheese (if you can find cheddar made with goat cheese, it works very well, otherwise, any sort of firm-ish goat cheese will do)
salt and freshly milled black pepper
For the salad:
1 x 3 oz (75 g) packet mixed salad leaves (such as lettuce, coriander leaves, flat-leaf parsley, rocket)
For the dressing:
4 fl oz (110 ml) extra virgin olive oil
1 rounded teaspoon cayenne pepper
2 level tablespoons ground cumin
2 heaped tablespoons tomato purée
4 tablespoons lime juice (about 2 limes)
To garnish:
1 level tablespoon black onion seeds (I can never find these, the salad doesn't suffer too much without them)
Method
Preheat the oven to gas mark 9, 475°F (240°C).
Now arrange the aubergine, courgettes, tomatoes, pepper, fennel and onion in the roasting tin (I usually use 2 cookie sheets), sprinkle with the crushed garlic, basil and olive oil, toss everything around in the oil to get a good coating and season with salt and pepper. Place the tin on the highest shelf (if using two trays, put one in top third, one in bottom third and swap after 15-20 minutes) of the oven for 30-40 minutes or until the vegetables are toasted brown at the edges. When the vegetables are done, remove them from the oven and stir in the chopped olives and the capers then allow the whole lot to cool.
When you're ready to assemble the salad, first place the couscous in a large, heatproof bowl, then pour the boiling stock or water over it (if you use water, you can boil it in an electric kettle to save time and washing a pot), add some salt and pepper, stir it with a fork, then leave on one side for 5 minutes, by which time it will have absorbed all the liquid and softened.
Meanwhile cut the cheese into sugar cube-sized pieces. Make up the dressing by whisking all the ingredients together in a bowl, then pour into a serving jug.
To serve the salad, place the couscous in a large, wide salad bowl and gently fork in the cubes of cheese along with the roasted vegetables. Next arrange the salad leaves on top and, just before serving, drizzle a little of the dressing over the top followed by a sprinkling of onion seeds and hand the rest of the dressing around separately.
Notes: I recommend only putting in as much salad greens as you plan to eat at that time, as they tend to get slimy if stored with the veggies. Instead, store dressing/salad/couscous and veggies separately, and assemble leftovers as needed.
Orzo Salad
This week's sunday salad. Not as extravagant as last week, but still tasty

Orzo salad
Makes 4-6 servings
Ingredients
1 1/2 cups orzo (I used tri-color orzo pasta)
Salt
Black pepper, ground
Extra virgin olive oil (evoo), about 3 tbsp.
1/2 lemon, juiced
2 red bell pepper, roasted* and peeled, diced
Olives, black and/or green, chopped (I used both)
1/2 cup Goat and/or feta cheese, crumbled/diced small (I used the left-over goat-cheddar from last week)
1 Ripe tomato, chopped
Cook pasta according to the instructions on the box (be sure to salt the water).
Drain and season with salt, black pepper, and a splash of a good fruity evoo. Add all the other ingredients, and toss.
* to roast the peppers, slice them in half, clean from the seeds, and place skin side up under the broiler. Once their skin is blackened, remove from oven and place in a bowl, cover with a lid and let it sweat and cool. Once cooled, the skin peels easily. I had never roasted them this way, it was dead easy--the *cut them in half* step is pure genius: no more wrestling with lop-sided peppers trying to get them to roast evenly.
Note: The astute chef will note that this is a pasta salad without red wine vinegar (which violates basic culinary principles). I was planning on adding it, but ended up deciding against it at the last minute. The cheese, olives, peppers and lemon gave it enough flavour. The vinegar seemed like overkill, but, to each his own. You could also add capers or a red onion, if you wanted to experiment a bit.
Encore

An awesome green salad complete with radishes, cuc's, arugula, lettuce, spinach, purple carrots, and a delicious dressing of left over vinagrette from the artichoke. Yum. The taste of summer.
Saturday, April 17, 2010
The Produce Box is Here! The Produce Box is Here!
Here's what was in it:
*Leeks
*Yukon Gold Potatoes
*Bibb Lettuce
*Spinach
*Collard Greens
*Cameo Apples
*D'Anjou Pears
*Strawberries
*Asparagus
*Purple Carrots
*Red Peppers
*Tangelos (similar to tangerines)
What struck me right off the bat was how well balanced this array of produce was. By well-balanced I mean that some of it was stuff that I buy at the grocery store on a weekly basis anyways (citrus, carrots, and apples fall into this category), while other items were things that I had forgotten how much I liked (asparagus, leeks, lettuce). In particular, lettuce--it's been *ages* since I made my salad from a head of lettuce rather than a bag of mixed salad, and with lettuce this fresh and crunchy, it was definitely a welcome change. And just to make things a bit more exciting, there was of course, the token item I had walked by a thousand times in the grocery store and never bought: collard greens. I'm sure Nige will have some suggestions as to what do do with them though.
The other concern I had had, when we signed up for the box was its size, I was worried that we were going to get enough veggies to feed a small army on our doorstep, without any guinea pigs nearby to help us get through them (Silky, my childhood pig used to go through at least one bunch of dandelion greens per week), be forced to spend the whole weekend cooking (which wouldn't be that bad) or throw some of them out (which ould be very bad). Luckily though, this seemed not to be a problem, and the amount of food we got was very reasonable for both the price and our needs . To quote a famous movie: Produce Box, "I think this is the beginning of a beautiful friendship".
Speaking of things you see in the grocery store and never buy, I bought an artichoke last week. They are in season right now, and the shelves are packed with monsterous spiky prehistoric looking globe artichokes. I just *had* to buy one (well, that and there was a recipe in my favorite F&W Cookbook that I wanted to try).
It came out very well, all things considered, and the excess vinagrette has been excellent on the organic Bibb lettuce, however, it did refresh my memory as to why I didn't buy artichokes very much. In the end, it all comes down to a princple which I have dubbed the Law-of-Lobsters (and crabs, and artichokes): They look very elegant in the store, and in the photos in the cookbook, however, when it comes down to it, an awful lot of hassle and hard work for not a lot of food.
That won't stop me from posting the recipe though, just be warned: only a very small portion of that artichoke is edible:
Artichokes with Scallion Vinagrette
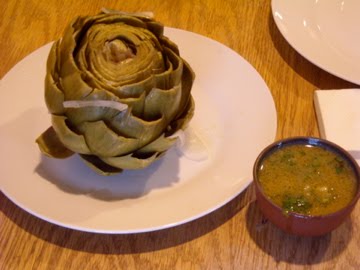
Serving info: The recipe calls for 4 artichokes. I only made one, as it was going to be a side dish with other food. I used the full portion of seasonings (onion, peppercorns, bayleaves, etc.) in the liquid for the artichoke, and it was not at all overpowering. I also made the whole portion of vinagrette thinking, (rightly) that it would come in handy for other things. However, if you don't want left-overs, you could probably half the portions of the vinagrette. In general, you can be pretty flexible with ingredient ratios in this recipe (add more oil if you like your vinagrette milder, or less if you like it vinegarier--you can guess which side I was on). I would say count on 1 artichoke per person if its a main course, and 1/2 an artichoke per person if its a side/appetizer.
Ingredients
1. 1 quart water
2. 1 cup plus 2 tablespoons olive oil
3. 5 1/2 tablespoons wine vinegar
4. 1 small onion, cut into thin slices
5. 12 peppercorns
6. 5 bay leaves
7. 1 1/2 teaspoons salt
8. 4 large artichokes
9. 2 teaspoons Dijon mustard
10. 4 scallions including green tops, chopped
11. 6 tablespoons chopped fresh parsley
12. 1 1/4 teaspoons lemon juice
13. 1/2 teaspoon fresh-ground black pepper
Directions
1. In a large wide stainless-steel pot, combine the water, the 2 tablespoons oil, 1 1/2 tablespoons of the vinegar, the onion, peppercorns, bay leaves, and 1/4 teaspoon of the salt. Bring to a boil.
2. Cut the stems off the artichokes and cut off the top third of the leaves. If you like, using scissors, cut off the tips from the remaining leaves to remove the thorns. Put the artichokes in the pot, stem ends down. Cover and bring back to a boil. Reduce the heat and simmer until the bases of the artichokes are tender when pierced with a small knife, 30 to 40 minutes. Remove the artichokes.
3. In a small glass or stainless-steel bowl, whisk together the mustard, the remaining 4 tablespoons vinegar, the scallions, parsley, lemon juice, the remaining 1 1/4 teaspoons salt, and the ground pepper. Add the remaining 1 cup oil slowly, whisking. Serve each artichoke with a small bowl of vinaigrette alongside for dipping.
P.S. Last Sunday's salad is still in the queue. I just haven't got round to posting it yet.
Tuesday, April 13, 2010
Beyond the Grocery Store

I was going to post about Sunday night's salad today--but in light of recent events, it will have to wait. It all started Sunday evening (after the salad) as I was feeling smugly satisfied for having made such a healthy, veggie-filled dinner. That was when my curiousity got the better of me, and I decided that Food Inc. would make an enjoyable (or at least informative) after-dinner movie experience.
I knew full-well what I was in for. Actually, its surprising that my movie choice wasn't vetoed on account of the rants caused by my reading Michael Pollan's In Defense of Food, a couple years ago. Perhaps it would have been better that way.
Indeed, In Defense of Food basically scared me away from the interior of the grocery store. My shopping trips these days almost always take me around the perimeter of the grocery store: produce, dairy, fish, and occasionally meat. My rule about the rest of the store is, if it doesn't come in a can (tomatoes and chickpeas), a jar (jam and pickles) or sack (flour, sugar, pasta etc.)--I'm not buying it. This seemed to work pretty well for weeding out the high-fructose corn-syrup masquerading as nutritive food...however, as Food Inc. explained, leaving little to the imagination, high-fructose corn-syrup was just the tip of the iceberg.
As I listened to the stories of more and more farmers being bought out/bullied/beat up by giant corporations trying to convince the world that we really only needed one genetic strain of soybean to feed everyone (coincidentally, it was the strain that they had patented) the guilt started to set in. Ok, so I wasn't buying the Twinkies in aisle 3, but I was buying the bananas in aisle 1, which probably didn't come from the local farmer down the way. Then I realized I didn't even *know* what was in season anymore. Clearly, it was time to seek out some serious remedial vegetable education.
There are several local farms in the greater seattle area, but getting to one to buy ones weekly produce is no small task, and unlike Toronto, where they all congregate at the St. Lawrence Market once a week, there is no central market (well, there's Pike Place, but Pike is mostly an overpriced tourist trap, and as much as I love organic produce and supporting local agriculture, I can't afford Pike). Then I remembered the produce box.
I first heard of the concept of a "produce box" in Nige's Kitchen Diaries. It sounded like a brilliant idea. Once a week, a box of fresh seasonal, locally grown produce shows up at your door, and you get to come up with creative ways to cook it, and the profits go direct to the farmers. Better still, it saves you wandering aimlessly around the grocery store trying to find culinary inspiration from an expanse of sterile, season-less plastic wrapped vegetables fruits imported from all over the world.
Now, if anywhere in the US was likely to have produce boxes, its the Pacific Northwest. In fact, a google search quickly revealed that there were 10+ CSAs (Community Supported Agricultures) which delivered weekly boxes in the Seattle area alone. As with most things on the internet, it was mind-numbing. Finally, after an evening of (not so) exhaustive research, we settled on New Roots organics, a CSA which bought produce from a couple local farms, and delivered boxes once a week. We liked it because it didn't require a season-long commitment, like other farms did, but felt more farmers-markety than other places, in that the boxes were put together based on what was in season, rather than customer preference (great for those of us who have been known to spend an hour wandering around the produce section, trying to decide what they want).
And so I did it. I signed up. Either this thursday or next, a box of local green goodness should be appearing on my doorstep, which, in and of itself is very exciting. The fact that it saves me having to carry flavorless grocery store produce home on my bike at least once a week, is equally, if not more exciting.
I guess that means that watching Food Inc, depressing as it was, wasn't such a bad idea after all. However, the search for a decent, local, organic butcher continues--any suggestions are welcome.
Tuesday, April 6, 2010
Sunday Salads and Monday Muffins
Sunday Salad
This Sunday, the salad of choice was Food and Wine's Chicken, Mango and Rice Salad, which, as the article says, makes a fairly hearty meal all by itself, especially for lunch. Not to mention the convenience factor: grill the chicken, cook the rice, chop the mango and the avocado, and assemble.

Ingredients
1. 1 1/2 cups rice, preferably short grain
2. 1 1/3 pounds boneless, skinless chicken breasts (about 4)
3. 1/3 cup plus 1 tablespoon cooking oil
4. 1 1/4 teaspoons salt
5. 3/4 teaspoon fresh-ground black pepper
6. 3/4 cup chopped red onion
7. 1 mango, peeled and cut into 1/2-inch dice
8. 1 avocado, peeled and cut into 1/2-inch dice
9. 3 1/2 tablespoons lime juice (from about 2 limes)
10. 3/4 cup chopped cilantro
Directions
1. In a large pot of boiling, salted water, cook the rice until just done, 10 to 15 minutes. Drain. Rinse with cold water. Drain thoroughly.
2. Coat the chicken with the 1 tablespoon oil. Season with 1/4 teaspoon each of the salt and pepper. Heat a grill pan over moderate heat. Cook the breasts until just done, 4 to 5 minutes per side. Alternatively, heat the tablespoon of oil in a large frying pan and season and cook the chicken as directed above. When the chicken is cool enough to handle, cut it into 1/2-inch dice.
3. Toss the rice with the chicken, onion, mango, avocado, the 1/3 cup oil, the remaining 1 teaspoon salt and 1/2 teaspoon pepper, the lime juice, and cilantro.
Monday Muffins
I'd been planning on making these muffins for a week, and finally got round to it on Monday evening. Being the citrus junkie that I am (orange marmalade, lemon loaf etc.), I decided they needed more lemon-ness than the recipe called for, and so put in the zest of 2 lemons, and the juice of 1 1/2 lemons. The only difference was that I had to cook them for an extra couple of minutes (possibly because the batter was a bit on the moist side). The original recipe suggests icing them, but I left mine uniced, since they tend to keep better that way.
Ingredients
2/3 Cup Sugar
Grated zest and juice of 1 lemon
2 Cups All-Purpose Flour
2 tsp Baking Powder
1/4 tsp Baking Soda
1/4 tsp Salt
3/4 Cup Sour Cream
2 Large Eggs
1 tsp Vanilla Extract
1 Stick (8 Tbsp) Unsalted Butter, melted and cooled
2 Tbsp Poppy Seeds
For The Icing
1 Cup Confectioners' Sugar, sifted
2 -3 Tbsp Fresh Lemon Juice
Method
Center a rack in the oven and preheat the oven to 400˚F. Butter or spray the 12 molds in a regular-size muffin pan or fit the molds with paper muffin cups. Alternatively, use a silicone muffin pan, which needs neither greasing nor paper cups. Place the muffin pan on a baking sheet.
In a large bowl, rub the sugar and lemon zest together with your fingertips until the sugar is moist and the fragrance of lemon strong. Whisk in the flour, baking powder, baking soda and salt. In a large glass measuring cup or another bowl, whisk the sour cream, eggs, vanilla, lemon juice and melted butter together until well blended. Pour the liquid ingredients over the dry ingredients and, with the whisk or rubber spatula, gently but quickly stir to blend. Don't worry about being thorough-a few lumps are better than over mixing the batter. Stir in the poppy seeds. Divide the batter evenly among the muffin cups.
Bake for 18 to 20 minutes, or until the tops are golden and a thin knife inserted into the center of the muffins comes out clean. Transfer the pan to a rack and cool for 5 minutes before carefully removing each muffin from its mold.
Thursday, April 1, 2010
Easy Italian Pt. 2: Basil + Vinegar + Tomatoes = Love
Chez Piggy Pasta
This dish came originally from Chez Piggy (hence the name), an upscale restaurant in Kingston, Ontario. The pasta itself is very low key though, and has evolved over time to be considerably different from the original recipe. It was the first thing I ever cooked and it remains one of my favorite go-to dishes of all time.

Ingredients:
1/4 c Balsamic vinegar
1/4 c Red wine vinegar
1/3 c Extra virgin olive oil
4 cloves of garlic (finely chopped)
1.5 pints of grape tomatoes
a large handful of torn basil (1-2 cups)
1 lb penne rigate
fresh bocconcini
Parmesan cheese
Directions:
1. Rinse the tomatoes and cut any especially large ones in half (try to avoid cutting them *all* in half though). Place the tomatoes in a deep frying pan, large enough so that the tomatoes are more or less in a single layer.
2. Add the balsamic vinegar, red wine vinegar, olive oil and garlic to the pan, and heat over medium-low heat. You can play around with the vinegar to olive oil ratio depending on how punchy you like your pasta. I like mine pretty intense, so I tend to go heavy on the vinegar, and cut back a bit on the oil. The key is to make sure that there will be enough liquid to coat the pasta.

3. While the tomatoes and garlic are cooking on a low simmer, put a large pot of water up to boil. Once it's boiling add some salt and the penne. The penne will be ready when it is aldente, and the tomatoes will be ready when the skins are just beginning to split (be sure not to overcook them or they will liquefy and leave you with a tomato sauce, rather than cooked tomatoes). Usually, the pasta and the tomatoes finish around the same time, but if the tomatoes finish first, you can just turn the heat to low, and cover them until the pasta is finished.
4. Combine the drained pasta with the tomatoey-vinegary sauce, and mix in the basil. Stir to combine.
5. Serve and garnish with grated Parmesan fresh ground pepper and sliced bocconcini (you can add the bocconcini prior to serving, but it will start to melt and get very very stringy, making serving a messy business).
Don't be fooled by the simplicity of this recipe--it packs an incredible flavour punch for so few ingredients. It also needs a good strong wine. I tend to have it with Shiraz (Trader Joe's Purple Moon), a Sangiovese or a Montepulciano d'Abruzzo (Farnese makes a great bottle of both).
On the other hand, if you're looking for a heartier meal, with perhaps a little less vinegar, there's always this option:
Ratatouille Pasta
Every time I make this dish it evokes some deep childhood taste-memory of eggplant and zucchini cooked in tomato sauce. I have not yet figured out where this memory came from--maybe homemade vegetable lasagna?
Anyways, this one if from the Food and Wine herbs and spices bible:

Ingredients:
3 tablespoons olive oil
1 onion, cut into thin slices
1 green or red bell pepper, cut into 1/2-inch dice (or both)
1 small eggplant (about 1/2 pound), cut into 1/2-inch dice
1 zucchini (about 1/2 pound), cut into 1/2-inch dice
3 cloves garlic, chopped
1 1/4 teaspoons salt
1/2 teaspoon fresh-ground black pepper
1 2/3 cups canned crushed tomatoes in thick puree (one 15-ounce can)
2 teaspoons wine vinegar
3/4 pound linguine
1/2 cup plus 2 tablespoons thin-sliced basil leaves
I like to add a pinch of red pepper flakes too, just to "kick it up a notch"
Directions
1. In a large frying pan, heat the oil over moderate heat. Add the onion and bell pepper and cook, stirring occasionally, until the onion is translucent, about 5 minutes. Add the eggplant, zucchini, garlic, salt, and black pepper (and red pepper flakes). Reduce the heat to moderately low and cook, covered, for 15 minutes, stirring occasionally.
2. Add the tomatoes and simmer, covered, stirring occasionally, until the vegetables are tender, about 10 minutes. Stir in the vinegar.
3. In a large pot of boiling, salted water, cook the linguine until just done, about 12 minutes. Reserve about 1/2 cup of the pasta-cooking water. Drain the pasta and toss with the vegetables, the 1/2 cup basil, and, if the pasta seems too dry, some of the reserved pasta-cooking water. Serve topped with the 2 tablespoons basil.
This one doesn't need as punchy a wine. F&W recommends a chardonnay, but being a red-wine person myself, I find something light like a tempranillo goes nicely.
So there you have it. Two simple yet tasty things you can do with tomatoes and basil (and vinegar). Enjoy!